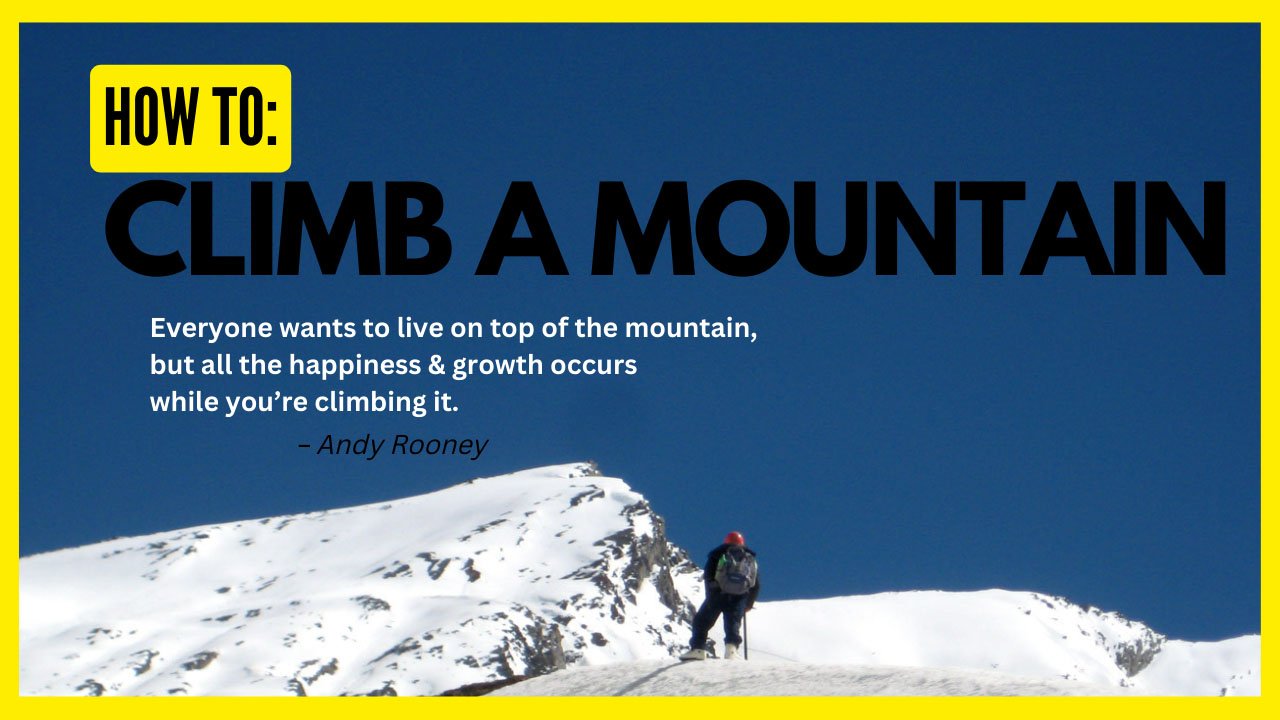
A Step-By-Step Guide in Planning Your First Mountaineer Expedition
Mountaineering is possibly the most fulfilling among hands down the most enthusiastic outside interests, offering reality in both actual and mental. Few activities can parallel the feeling of standing on a summit, a task that often requires skill, endurance, caution (in the face of unpredictable weather and often overwhelming odds). Starting your first mountaineering expedition though can seem intimidating, as much of the preparation goes beyond the realm of physical training. It requires you to think things through, manage the risks of what ever it is your about to get into and make sure you have the correct gear and know how in order for your adventure to be successful as well as safe.
In over 20 years of mountaineering on some of the world’s most renowned peaks, I’ve discovered that before you even put foot on that mountain, unless you get these right, your expedition is already off to a rough start. Regardless if you are going after a popular summit or negotiating a seldom-visited journey, the groundwork for your experience is done during the preparation process. In this guide I will take through step by step process to plan your first mountaineering expedition from picking the right mountain, to logistics, gear and training.
1. Pick The Right Level Mountain
The single most important decision you will make is choosing the right mountain to climb on your first ever mountaineering adventure. Approaching smaller until you gain ascents under your belt and skill will then lead to dreams on BIG ones like Everest or K2!
THINGS TO CONSIDER BEFORE YOU CHOOSE YOUR FIRST MOUNTAIN
Level of Difficulty: Find a mountain that suits your fitness and skill level. Focus on trips that include non-technical climbing sections (advanced rope and ice climbing skills are not needed), a moderate amount of gain, and an obvious trail or established route.
Altitude: If it’s going to be your first time, don’t try to climb mountains that will require acclimatization over 5,000 meters (16,404 feet). For the uninitiated, altitude sickness can be serious.
Choose a mountian that is easy to get to and popular [Source: Serifipress]. The most famous peaks in the well frequented mountaineering regions such as the Alps, Rockies or Pacific Northwest will usually have marked trails, guides and rescue services available.
Ideal Mountains for Newbies
Mount Hood, USA: Found in Oregon Mount Hood is a novice most loved peak. It’s a good starter glacier trip with a known way and only moderate difficulty.
Kilimanjaro (Tanzania): Kilimanjaro is the highest peak in Africa, topping out at 5,895 meters (19,341 feet) and is of the Seven Summits. It is non-technical, but requires excellent physical endurance and provides a fantastic high-altitude trekking experience.
Mont Blanc (France/Italy) – The tallest in Europe this trail tops out at 4,808 meters is more for the thicker skin of beginners able to use crampons and ropes on glaciers.
2. Study the Route and Weather
After you have a mountain selected the next thing to do is research your route. This would make you familiar with the land and weather condition, telling you whether there is any potential hazard before preparing yourself mentally or physically for the journey.
Key Aspects to Research:
Description of the route: Either informed on detailed guides or well-versed experienced mountain climbers who have done it before. Check the terrain, technical sections (if any) and how long it is.
Season and weather: The best time of year for the summit attempt Most peaks have a brief weather window and some of the freezer drizzles are snow covered only during their wettest time. Winter is the hardest season for novice trekkers on most mountains but it can really differ.
Permits (note: some mountains such as those in a national park may require permits) Remember to purchase any required climbing permits with plenty of time.
Wildlife / environmental hazards — Be aware of any potential wildlife encounters (bears) and of natural hazards if the area is glaciated (e.g. avalanches, crevasses).
For example, if you plan to visit Mount Rainier in Washington State, that means getting familiar with glaciated routes as well as weather windows and possible hazards such as crevasses and rockfall.
3. Condition Your Body for Mountaineering
Notably, mountaineering requires stamina and strength in your legs, core and upper body as well. Climbing a big mountain requires more than just walking, The physical demands of long days going uphill with heavy packs in high altitude are things you will not experience if you are only doing flat hikes.
Mountaineering Training Program Components
Cardiovascular fitness : Climbing is a long-duration aerobic exercise that requires some sustained endurance. You can build your cardiovascular fitness through running, cycling or swimming (with a loaded backpack) or hiking. Shoot for 3–5 cardio sessions a week.
Conditioning: Develop your legs, core and upperbody strength training. Squats, lunges, deadlifts, and step-ups for your legs Core work like planks and Russian twists
Backpacking: Begin by hiking with a weighted pack (a backpack that has been loaded to represent the weight you’ll be using on the expedition. Each time you hike, add more weight and walk further to increase your stamina. This will also be beneficial to help your body adjust to carrying with gear at high altitudes.
Train at altitude — this allows you to adapt somewhat to the difference of 7,000ft.+ attitude. This can help reduce the chance of altitude sickness on your journey. Finally, if you live near mountains and large hills, train on them or use an elevation mask during workouts or plan on a couple of acclimation hikes when setting out for the trail.
Training: It is recommended to train a minimum of 3–6 months before the expedition depending on your current fitness level and the difficulty of the mountain.
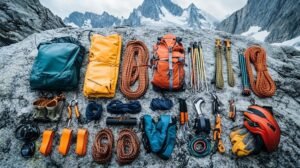
4. Get Ready: What To Pack For Mountaineering
The proper gear can be the difference between life and death in the mountains. Climbers must negotiate many obstacles along the way, from snow and ice to wind and freezing temperatures. You must carefully choose your gear and test it before the expedition so that everything runs smoothly.
The 12 Essentials of Mountain Safety [INFOGRAPHIC]
Clothing (Layering System):
Base layer: High in moisture management, constructed from a fibre like merino wool or synthetic material, the base- and second-layer provide a dry surface to the skin.
Mid layer: An insulating fabric that traps body heat.
Outer layer: Waterproof / breathable Gore-Tex jackets and pants
Gloves: Insulated, waterproof gloves and a thinner glove for dexterity
Headgear — warm hat, neck gaiter and UV-protection sunglasses or goggles.
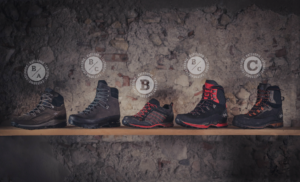
Footwear:
Best for: Waterproof, insulated, crampon compatible boots for mountaineering.
Socks – Wool or Synthetic, plus extra pairs to stay dry in wet conditions.
Gaiters- To prevent snow and debris to go into your boots.
Technical Gear:
Ice Axe: Self-Arrest and snow slopes balancing
Crampons: Trade your boots for shoes with metal teeth.
Helmet: Protects you from falling rocks (or ice).
Climbing harness and carabiners: Essential in glacier or technical climbing an cogitations.
Rope- For glacier travel or technical sections; know how to use it properly
♦ Backpack — 50–70 liters: A backpack capable of carrying gear, food, and layers.
Hiking Poles: These are handy for keeping your balance and taking some of the pressure off your legs when hiking up or down those long, steep pitches.
Navigation Tools:
Map & compass : always carry a physical map and you need to know how to use a compas理解 which you can find her aware on Amazon.
GPS or Altimeter: Great for MonitoringProgressand Altitude
Safety and Emergency Gear:
Blister treatments, band aids and altitude sickness medication (I promise you wont be needing this).
Headlamp, extra batteries (early starts/late descesents)
Emergency shelter: A bivy sack or something similar (sol bivy SOS and similar) for a backup to keep you out of the wind if weather changes unexpectedly.
Food and Hydration:
Carry high-calorie foods: Nuts, energy bars, dried fruits and dehydrated meals are simple to pack and very portable.
Hydration system (water bottle or hydration bladder + water purification, i.e. tablets or system)
Pro Tip: Test your gear during training hikes to make sure everything fits and works well. Know how to use your ice axe, crampons and any rope systems before going onto the mountain.
5. Essential Mountaineering Skills And How to Learn Them
Sure, if you often hike uphill, it can help test your endurance, but mountaineering is not just climbing a mountain. These are things important for your safety as well as the success of the expedition.
Stuff You Should Get Good At:
Self-arresting with an ice axe: This is a safety critical ability to prevent you falling off from a winter snow/ice slope if sliding.
Walking and climbing with crampons, on ice whether it is flat or stepped regain.
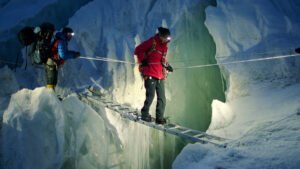
Glacier travel: If your mountain of choice involves a glacier approach you will need to know the skills to safely make your way across crevassed terrain and perform crevasse rescue techniques.
Lines: Belay, Rappel and Rope Systems for Life maintenance on the rock. Such as knot tying, anchor building
, or roping up for glacier travel.
Read the weather: Mountain weather signs, and how to read clouds, wind direction and temperature changes can help you prevent a dangerous situation.
These are great skills to learn under the supervision of a qualified guide or organization such as the American Alpine Institute or International School of Mountaineering. These courses are essential for getting much of the hands-on experience you need to feel comfortable heading out on your first summit.
6. Getting Ready for the Psychological Game of SummitTrips
Climbing a mountain is not just physically challenging, but also tests the mental stability of a person. Even for seasoned climbers, long days in the mountains and adverse weather conditions can throw curveballs and disrupt one’s daily routine.
Tips for Mental Preparation:
Imagery: Prepare and practice mentally by imagining the climb, part for part. Visualize yourself on the scary parts, hitting your keyboard checkpoints or tattoos and conquering Palanquin.
Embrace fear and uncertainty: Worrying about tech sections, exposure or the potential for bad weather becomes normal. If you stay busy, focused on the task at hand or brick by brick, anxiety will never catch up.
Be flexible: Mountains are unpredictable, and you might have to alter plans at the last minute. In case the weather report introduces some ill-forboding conditions, do not hesitate to alter your route and pace or double-back if need be.
7. Organize Your Trip Logistics
So you’ve selected the mountain, set about training your body and rounded up all the gear — now it’s time to address the overall logistics of your expedition. This requires scheduling travel, accommodations, permits and backup plans.
Key Logistics to Plan:
Travel & Accommodation: Book any flights, bus rides, or local transfers as per your plan to reach the mountain. Add more time to acclimatize and recover on international climbing.
Base camp = where a lot of successful mountaineering endeavors start Whether you establish a new one or utilize one of the existing infrastructure. If you are camping, remember to bring all of your camping gear.
Permits and Rules: Obtain any necessary climbing permits and be up to speed on what are the rules of the area. There are regulations on disposal of waste, maximum group sizes and which route you are allowed to use for some peaks (national parks).
Contingency plan: Make sure you have a plan if weather becomes an issue, or if you get hurt, etc. Know where your nearest emergency shelter is and how to contact or alert the authorities in a worst-case scenario ( sat. phone / GPS locator, etc).
8. Participate in a guided expedition or create your own team
Don’t feel prepared to tackle your first mountaineering expedition alone? Sign up for a guided climb! Guided tours are available from many companies which provide a leader to teach you new things, support along the way as well as taking care of all other headaches.
The pros of participating an escorted trip
Set out with a seasoned pro: Just as you would with any major outdoor adventure, doing the hike with a RMI Expedition Guide who really knows the mountain, including its peculiar weather patterns and best route to take. They provide advise, guidance and instruction on safe practices when negotiating difficult terrain.
Guide gear: A few guided expeditions come with shared equipment, including tents, cooking supplies and ropes which minimizes the load you have to carry.
TEACHES YOU REAL WORLDSKILLS: A guided expedition allows you to learn real world skills from professionals and practice in a natural environment.
If you like to climb with friends or fellow mountaineers, make sure your team has the same level of fitness, experience and goals. Communication and team work are the hallmarks for a successful outing.
Conclusion: Your First Summit Awaits
Whatever the case may be, organizing your first mountaineering expedition is no easy feat, however with some planning efforts you can make any mountain climbing experience a safe one as well as successful. Choosing an appropriate mountain for your skill set, training your mind and body, learning essential skills, organizing logistics carefully — all will ensure a successful journey in the mountain. After all, the journey is as important in mountaineering as much as reaching the summit. All the way up that mountain every single step you take is going to test you, it will stretch your limits and at the end of the day it may break you down leaving you with a memory of getting through! So get yourselves packed, read up and go confidently on your first mountain climb, you are all set to rule the peaks.