Introduction:
Hiking is one of the most rewarding outdoor activities for people of all ages and fitness levels. Whether you’re hiking through towering forests, scaling rugged mountains, or walking along scenic coastal paths, it’s an incredible way to connect with nature, exercise, and enjoy the peace that comes with being outdoors. However, if you’re new to hiking, it can be a bit daunting to know how to start, what to bring, and most importantly, how to stay safe.
This guide will walk you through 10 essential hiking tips for beginners to ensure your hike is not only fun but also safe and comfortable. These tips cover everything from choosing the right trail to staying hydrated, pacing yourself, and what to do in case of an emergency. By the end of this article, you’ll be ready to lace up your boots and hit the trail with confidence.
Tip 1: Start with Easy Trails
When you’re just starting, it’s important to ease into hiking by choosing beginner-friendly trails. The mistake many beginners make is picking a trail that’s too long or too difficult, which can result in a negative experience, leaving you sore, exhausted, or even injured.
How to Choose a Beginner-Friendly Trail
Look for trails that are shorter and have little elevation gain. Most hiking apps or trail guides will indicate the difficulty level of a hike. Start with trails labeled as “easy” or “moderate.” A good rule of thumb is to start with a hike that’s no longer than 3 miles round-trip with an elevation gain of less than 500 feet. This will allow you to get comfortable with the experience without over-exerting yourself.
Where to Find Hiking Trails
There are a few great resources to help you find trails in your area. Apps like AllTrails and Hiking Project allow you to search for hikes based on location, distance, and difficulty. You can also check your local park’s website or the National Park Service website for detailed trail maps and suggestions.
Key Takeaway: Start slow, and gradually build up to more challenging hikes as your fitness and confidence improve.
Tip 2: Check the Weather Before You Hike
Weather conditions can make or break your hiking experience, especially if you’re not prepared. A sunny, mild day is ideal for hiking, but other conditions can arise that may make the trail unsafe or uncomfortable.
Why Checking the Weather Matters
Extreme heat, thunderstorms, and snow can create hazardous conditions on the trail. Always check the forecast a day before and the morning of your hike. If there’s a chance of thunderstorms or heavy rain, it might be best to reschedule your hike.
How to Dress for the Weather
If the weather is cooler, dress in layers so you can add or remove clothing as needed. For summer hikes, wear light, breathable fabrics that wick moisture away from your body. And no matter the weather, always bring a rain jacket just in case you get caught in an unexpected downpour.
Key Takeaway: Dress for the conditions, and always be prepared for sudden changes in weather.
Tip 3: Wear Proper Footwear and Clothing
One of the most important aspects of enjoying a hike is wearing the right shoes and clothes. Poor footwear can lead to blisters, sore feet, and even injuries, while the wrong clothing can leave you cold, overheated, or uncomfortable.
Choosing the Right Footwear
For most beginner trails, a pair of sturdy walking shoes or trail runners will suffice. However, if you plan on hiking more rugged terrain or carrying a heavier backpack, you may want to invest in a good pair of hiking boots that provide ankle support and have deep tread for better grip.
Layering Clothing for Different Weather Conditions
Hiking involves a lot of moving, so you’ll likely warm up quickly. Wearing layers allows you to easily regulate your body temperature. For colder weather, start with a moisture-wicking base layer, add a fleece for warmth, and top it off with a windbreaker or rain jacket. For warmer weather, lightweight, moisture-wicking shirts and shorts or pants are best.
Don’t Forget Sun Protection
Regardless of the season, wearing a wide-brimmed hat and sunglasses, and applying sunscreen, will help protect you from the sun’s rays.
Key Takeaway: The right clothing and footwear can make all the difference between a comfortable hike and an uncomfortable one.
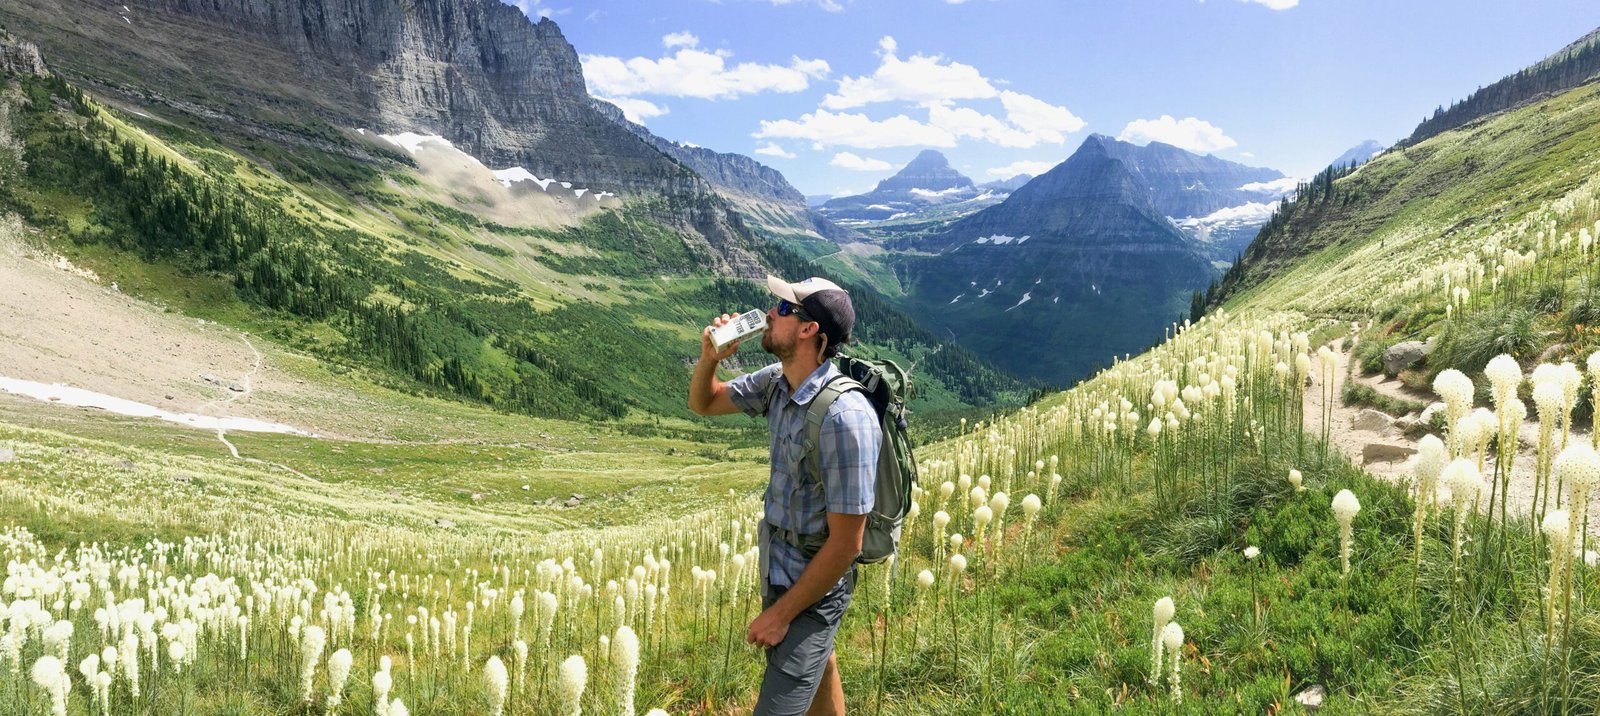
Tip 4: Stay Hydrated and Bring Enough Water
Dehydration can set in quickly when you’re hiking, especially in hot weather or at higher altitudes. Always bring plenty of water with you and take sips regularly, even if you don’t feel thirsty.
How Much Water to Bring
A good rule is to drink at least half a liter of water per hour of moderate activity in moderate temperatures. In hotter weather or on more strenuous hikes, you’ll need more. If you’re hiking in a remote area where refilling is unlikely, bring extra water. For longer hikes, consider using a hydration bladder, which allows you to sip continuously without having to stop.
Portable Water Filters
If you’re going on a long hike or a multi-day trek, carrying enough water may not be practical. In that case, a portable water filter or purification tablets can help you drink safely from natural water sources like streams and lakes.
Key Takeaway: Staying hydrated is key to a successful hike. Always carry more water than you think you’ll need.
Tip 5: Pack Light but Smart
One of the mistakes beginner hikers make is either under-packing or over-packing. You want to bring enough to stay safe and comfortable, but not so much that you’re weighed down.
Essential Items to Pack for a Hike
For day hikes, you’ll want to pack a few essential items:
– First aid kit (include bandages, blister pads, antiseptic wipes)
– Snacks (high-energy foods like trail mix, nuts, energy bars)
– Map and/or GPS device
– Multi-tool or knife
– Extra layer of clothing
– Headlamp or flashlight (even if you plan to finish your hike before dark)
Packing Efficiently
Use a backpack with padded shoulder straps and a waist belt to distribute the weight evenly. Keep the heaviest items close to your back for better balance. Only bring what you need to avoid carrying unnecessary weight.
Key Takeaway: Packing smartly means balancing essentials with comfort. Keep your pack light but ensure you have the necessities.
Tip 6: Hike with a Buddy or Tell Someone Your Plan
Hiking alone can be peaceful, but it can also be risky, especially for beginners. If possible, hike with a friend or in a group. If you prefer solo hikes, always let someone know where you’re going and when you plan to return.
Safety in Numbers
Hiking with a partner ensures that you have help in case of an emergency. It’s also more enjoyable to share the experience with someone else. If you’re going alone, you can check in with park rangers or leave your itinerary with a trusted friend or family member.
Creating a Hiking Itinerary
Your itinerary should include the name of the trail, your planned route, expected start and end times, and any notable landmarks along the way. Don’t forget to check in once you’ve completed your hike.
Key Takeaway: Always let someone know your hiking plan, especially if hiking alone.
Tip 7: Know Your Trail Markers and Maps
Getting lost on a trail is not only frustrating but can be dangerous. Many beginner hikers rely on their phone’s GPS for navigation, but cell service can be spotty in more remote areas.
Understanding Trail Markers
Most well-maintained trails will have markers—blazes of color on trees or rocks—to guide you. Get familiar with what these markings mean before heading out, and always pay attention to the signs at trailheads.
Using Trail Maps
Even if you’re relying on a GPS app like AllTrails, it’s always a good idea to bring a physical map in case your phone dies or you lose service. Learn basic map-reading skills, like how to identify the trail, contour lines, and elevation.
Download Maps for Offline Use
Some apps allow you to download maps to your device so you can access them offline. Always download the map of your trail before starting your hike.
Key Takeaway: Being able to navigate is crucial. Learn how to read trail markers and maps, and always carry a backup.
Tip 8: Respect Wildlife and Nature
Hiking is about enjoying the natural world, but it’s important to remember that you’re a visitor in someone else’s habitat. Respecting wildlife and the environment ensures that future hikers can enjoy the trail, too.
The Leave No Trace Principle
The Leave No Trace principle encourages hikers to minimize their impact on the environment. This includes packing out all your trash, staying on the trail to avoid damaging fragile ecosystems, and not disturbing wildlife.
Staying Safe Around Wildlife
Most animals will avoid you if you leave them alone. If you encounter wildlife on the trail, observe from a distance. Never
feed animals, as this can make them reliant on humans and disrupt their natural behaviors.
Key Takeaway: Leave nature as you found it, and always respect the wildlife you encounter on your hike.
Tip 9: Pace Yourself and Take Breaks
Many beginner hikers try to rush through a hike, only to find themselves exhausted halfway through. Hiking is not a race—pace yourself and take breaks to enjoy the scenery and rest.
How to Pace Yourself
Start slow, especially if you’re on an uphill section of the trail. It’s better to maintain a steady pace than to rush and burn out quickly. Listen to your body, and slow down if you’re feeling out of breath or fatigued.
Taking Rest Breaks
Don’t be afraid to take breaks—find a shady spot or a scenic view to sit for a few minutes, hydrate, and enjoy a snack. Resting not only helps conserve energy but also allows you to take in the beauty around you.
Key Takeaway: Hiking is about enjoying the journey. Pace yourself and take breaks to fully experience the trail.
Tip 10: Know Basic First Aid
Accidents can happen on the trail, even on an easy hike. Knowing basic first aid can prevent a minor injury from becoming a major problem.
Common Hiking Injuries and How to Treat Them
Blisters: One of the most common hiking ailments. If you feel a blister coming on, stop and apply a blister pad or moleskin to the affected area.
Sprains: If you twist an ankle, stop hiking immediately. Wrap the ankle in an elastic bandage for support and elevate it if possible.
Dehydration: Symptoms include dizziness, dry mouth, and fatigue. Drink water immediately and rest in the shade.
First Aid Kit Essentials
Carry a small first aid kit with adhesive bandages, antiseptic wipes, tweezers, pain relievers, and a small elastic bandage for sprains.
Key Takeaway: A little preparation can go a long way. Carry a basic first aid kit and know how to handle common hiking injuries.
Conclusion:
Hiking is an incredible way to experience the outdoors, and by following these 10 essential tips, you’ll be well-prepared for a safe and enjoyable adventure. Whether you’re trekking through mountains, exploring local parks, or tackling your first fourteener, these guidelines will help you stay safe, comfortable, and confident on the trail.
Remember, hiking is about the journey, not just the destination. Take your time, enjoy the scenery, and embrace the peace that comes with being out in nature. So grab your boots, pack your bag, and hit the trail—an unforgettable adventure awaits!
FAQs About Hiking for Beginners
1. Should I hike alone as a beginner?
It’s safer to hike with a partner, especially if you’re a beginner. If you must hike alone, let someone know your plans.
2. What is the best time of day to start a hike?
Early mornings are generally best to avoid the heat and to give yourself plenty of daylight to finish your hike.
3. How do I know which trails are beginner-friendly?
Look for trails labeled as “easy” or “moderate” on trail apps or websites like AllTrails. Stick to shorter, well-marked trails to start.